Showing posts with label Organization. Show all posts

Kitchen Series: A Decorating Extension

As you know, my kitchen is a little smaller.  With this, I have had to be a little more creative when planning out my kitchen decorating.  Our kitchen leads to our family room through this hallway that was always empty.  I couldn't extend the cabinets any further so instead I decided to add this hanging utensil decoration.  Adding this piece to the wall made the kitchen seem that much bigger.  It took your eye to a wall that was always ignored and now it has become a useful area.  If you are interested in creating this in your home, remember to keep whatever you decorate with slim to the wall.  The last thing you want to have is one more thing to maneuver around.  You don't have to use something like this either.  You could simply hang some decorative hooks on the wall and achieve the same look.


Not only did I create an extension to my kitchen, but this has become a very useful decoration to me.  With having my oven mitts so readily available it has been such a help with cooking.  It has also cleaned up some space in my drawers which everyone could use in a kitchen no matter the size.


Coming up next in the Kitchen Series is my window transformation!

Kitchen Series: A Fresh Coat of Paint

Welcome to my new Kitchen Series!

As you recall, my husband and I completely renovated our kitchen from the ground up.  Since then, I have made a few minor changes that have dramatically changed the look of our kitchen.  I didn't think I could be happier with our space until I made these updates.  With my new kitchen series, you will be able to see all of the changes that I have made.  To remember what the kitchen looked like before click here

To kick off the series, I am unveiling my new paint color.  I loved the color before, but with a smaller kitchen and the updating that I have done in the rest of my home it needed a change also.  I have been painting some of the other rooms in my home to create a more clean, neutral look throughout so I wanted to continue that in my kitchen.  If you are interested in the paint color, email me and I can give you the details.  Don't be afraid to paint and try something new.


While I was updating the paint color, I also wanted to update my decorations/necessities to match the new look.  I wanted to keep the room very light and open.  In order to do this, I have used whites, creams, and natural coloring to keep the space unified.  With such a small space, you definitely need to keep the room cohesive, so that it doesn't give you a headache when you walk into the room.  


With keeping the room light and neutral, I can always switch out my dish towels whenever I like.  Currently I am sticking with my white and mustard yellow you could say.  


When storing those spoons, spatulas, whisks, and whatever else you have collected over the years, don't be afraid to try something a little more unique.


I hope you enjoy my new color as much as I do.  I love color, but there is something about that clean look that makes a space feel light and stress free.  Stay tuned for the rest of the Kitchen Series!

Creating an Outdoor Room

I am so excited that it is time to start thinking about the outdoors!  I know it may seem early for some people, but the earlier you start planning your outdoor space, the more money you save.  By planning early you know what you are looking for so you can take your time and get the savings.  Plus, it also gives you time to complete all of the money saving DIY projects.

This year I have decided to create an outdoor living and dining area on our deck.  I love to be outdoors, but if it is not comfortable no one will want to hang out and stay.

Whenever I am deciding how I want to decorate a room, I always mark things in magazines and online so that I can get a good feel on how it will turn out.  By doing this I can change my mind and make changes without losing any money.

So that's exactly what I am currently doing with my outdoor plans.  The picture below is from the PotteryBarn magazine.  I love the simplicity of the black and white in this picture with the touches of greenery.


I have circled the black candle holders but this is something that I would not want to spend a lot of money on because my deck is not covered.  Anything that I put out will be exposed to the sun and rain damage.


In this picture I love how you have the mix of all of the different kinds of pillows.  It makes it look less formal and more inviting. 


This is one of my main focuses this year.  I love all of the different lanterns on the steps.  It looks great during the day plus it could serve as an added light at night by adding battery operated candles.


I'm not sure if I will try and recreate anything like the above picture but I really liked the idea of something hanging from the dining table umbrella so I marked it.  This is where you can take advantage of marking things you like.  You are not locked into any ideas.


Even though my backyard doesn't overlook the ocean, it doesn't mean that you can't bring the ocean to you.  I haven't decided how, but I would like to incorporate this beach feel to my backyard.  


I love all of these pitchers.  They are great for having company over because you can leave it outside plus it's nice if you are out doing yard work you don't have to be in and out of your house all day.

Now that I know what I would like my outdoor room to look and feel like I can begin to put it together.  I can't wait to show you the final project.

Complete Kitchen Renovation

When my husband and I were deciding on the house that we now live in, we knew that we would need to completely renovate the kitchen.  It's a small kitchen, but that wasn't even a problem for us.  It was very outdated, the appliances didn't work very well, and the layout wasn't very functional.  We took the room down to the studs.  This was a lot of work, but it was well worth the expense and wait.  By doing this, we were able to rearrange the appliances, add new switches and plugs, and expand the doorways.

Here are all of the before pictures...


And now for the after pictures...


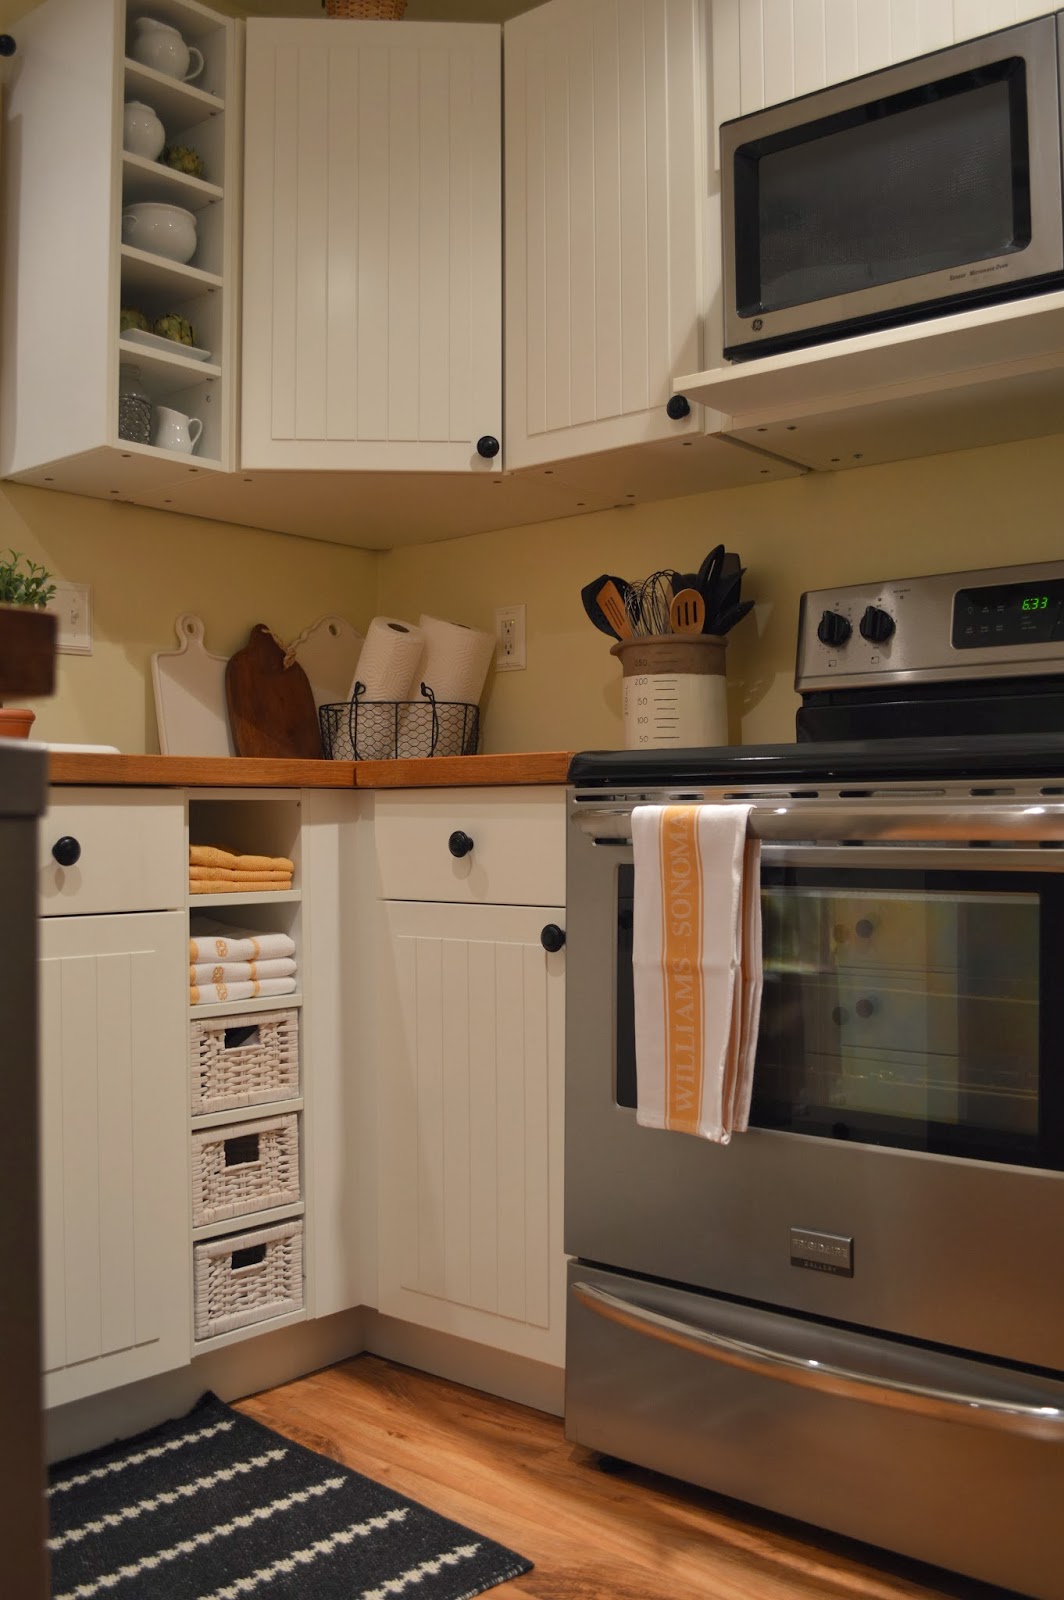
When we began to put the room back together, the first thing that we had to decide on was our cabinets and layout.  I chose to go with cabinets from Ikea because they have an enormous amount of selection between style and color.  With our kitchen being smaller, I knew I would have to choose my cabinets wisely.  We had to put them together ourselves, but it really wasn't bad.  I also chose to get our butcher block countertop from Ikea as well.  Our appliances are Frigidaire Gallery from Lowes.  There's nothing like new appliances.  I still have to add my backsplash.  Once I do, I will be sure to share the pictures with you.


I don't like to overcrowd a window with decorations, because after all you want to be able to open and close it.  However, I do like to dress it up like everything else.  When putting the trim around the window, I added a ledge to the bottom so that I would have a place to set my little decorations.


I saw this in a magazine before and really liked it.  Not knowing if they purchased the letters finished or unfinished, I knew I had to create them myself.  I bought the letters from Joann Fabrics and spray painted them white to match the cabinets.  I chose a simple font, but they have others as well.  With the letters being leaned against the wall they can be removed at any time.  I also like to decorate in ways that are not very typical.  I didn't want to have a typical paper towel holder.  Instead, I took this wire basket (painted it black) and threw a couple of paper towel rolls in it.  


I always try to incorporate decorations that tie in either colors or feels of a room.  That is what I did with these containers here.  It brings the black and the white together into one piece which makes the connection between the two colors.


These shelves were a must to incorporate into my kitchen.  I love how on the top I can display different dishes  and the bottom I use for towels and baskets.  In the baskets I have chip clips, measuring spoons, etc.  Having these baskets lets me free up some space from my drawers which is always needed.


Keeping with not liking typical uses of items, I found this white strainer at HomeGoods one day and thought it would be really cute to sit on the counter and put different fruits in.  It is not something that I keep out all the time, but it is a nice accent when I do have it out.

I hope you enjoy my complete kitchen renovation.  It took a lot of time, but it is so nice having everything just the way you want it.  If there is anything I missed and you have any questions for me, feel free to email me.  I would love to help you create your dream kitchen too!

Linen Closet Organization

Like every older house, your closet space is limited.  This is something that we have been trying to deal with since the day we moved in.  It's been a few years, but we have finally gotten around to re-organizing our closets one by one.  One of our main problems was our bathroom organization.  There is no closet in our bathroom to hold towels, supplies, and all of your bathroom necessities.  However, there is a closet close by that we were able to dedicate some space to the bathroom.

The closet before was something that I didn't want to be opened if anyone was around.  It seemed kind of dirty with old paint and old wood shelves.  It wasn't something that I loved putting my bathroom things in.  So, the first thing I did was remove the old shelves and mud all of the holes.  The next thing I did was paint the closet the same color of the room it is in.  The shelving was a simple project because I didn't want anything too special.  I just wanted plain shelves that were clean and open.  

Going back to limited closet space, I can't dedicate one of my main closets to one single thing.  It has to be double duty.  So, with this closet I use it for all of my bathroom needs and my dog needs.  I know it's an odd combination but with the layout of my house it works great.


I use the top half for bathroom storage and the bottom half for my spoiled dog.  The very top of the closet holds things that I don't need on an every day basis.  The solid brown baskets at the top are a great option for things that you don't want everyone to see.  The next shelf are all of my towels.  The things I use every day are held in the natural basket.  This way I don't have to pull anything out, I can just reach into the basket. 


Now on to the dog portion for all of you dog lovers.  Treats are an essential, but they come in the most awkward boxes.  So, I bought these jars from Target to hold her different treats.  They look nicer and stay fresh longer.  If your wondering why I also have a wire bin full of towels, it's because I have a very sloppy dog and you have to wipe her face. (I know...disgusting but I love her)  On the bottom we have all of her toys in a basket.  We keep some out for her but it's a great place to throw them when having guests over. 


I hope my organization can give you some ideas for your own organization.  One piece of advice is to mix baskets for your storage.  It's hard to find the same basket with all of the different sizes you need so instead of stressing mix and match!

Decorating with Baskets

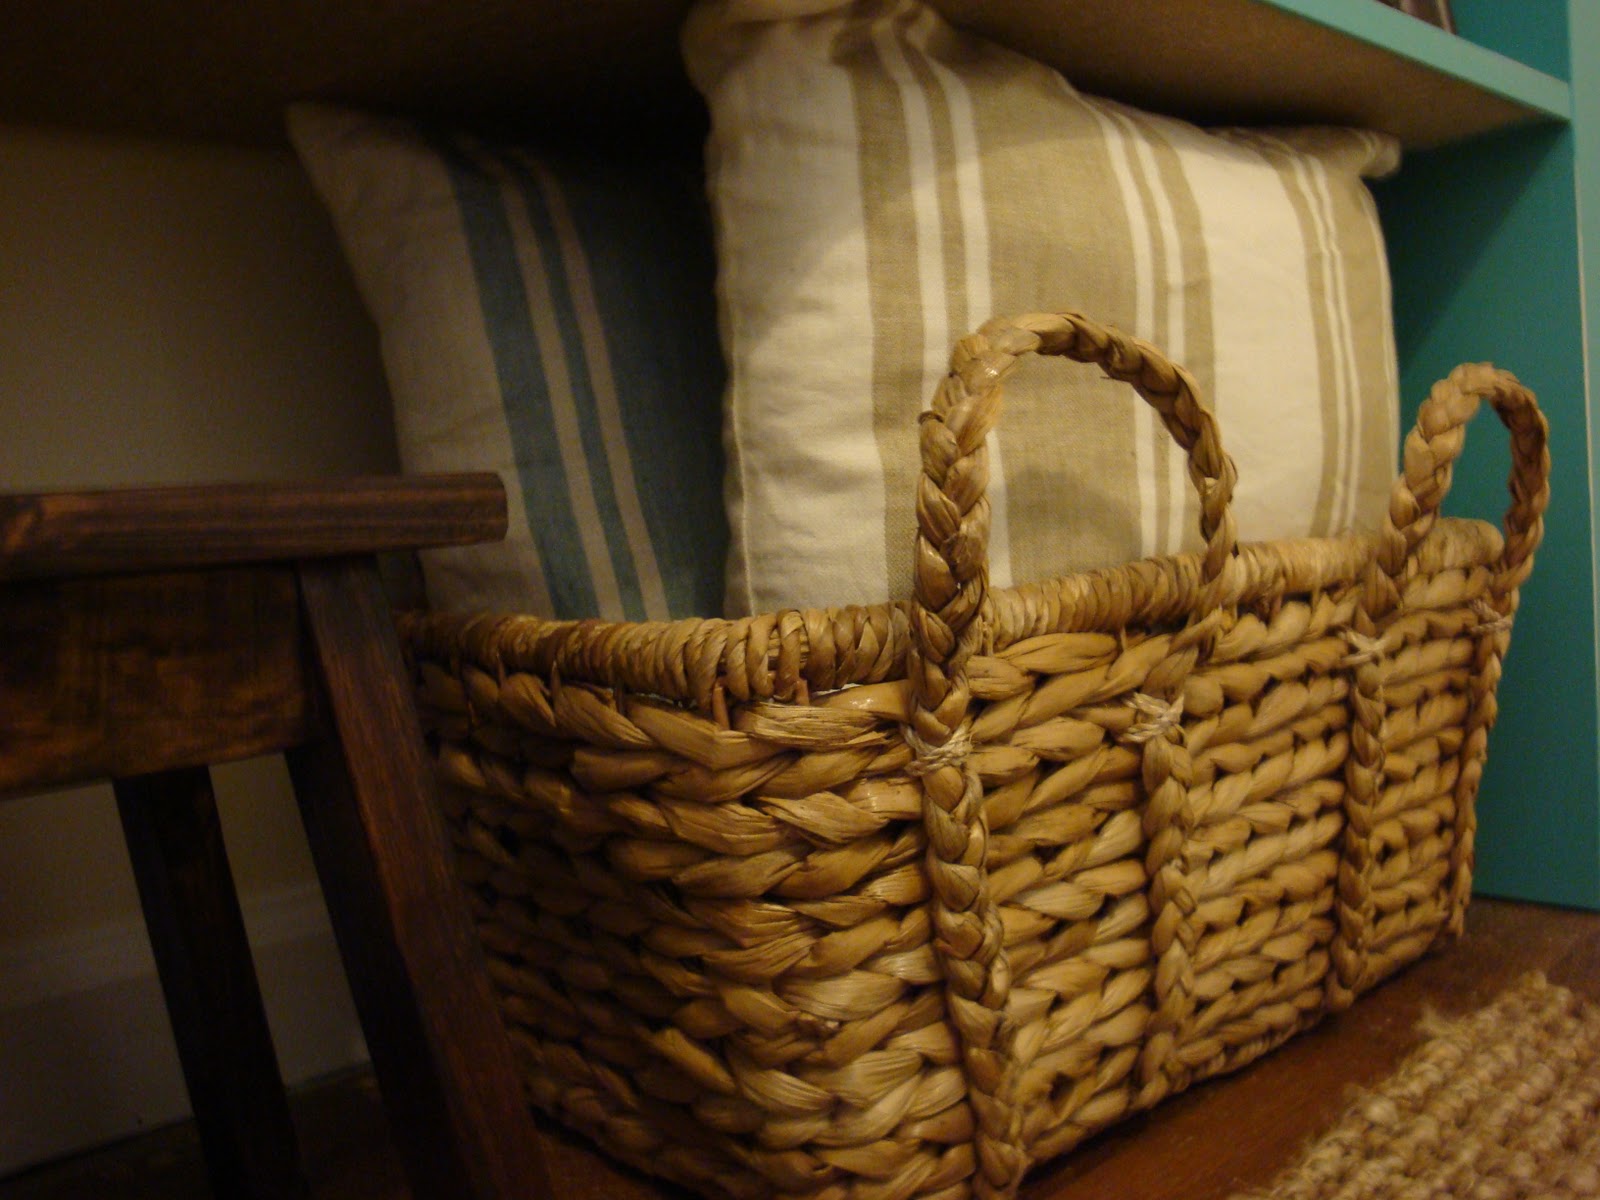
I love organizing myself with baskets.  It's such a great way to free myself of clutter, plus they look great in any room.  The easiest way to ruin a nicely decorated room is to have piles of clutter everywhere.  You can use baskets by themselves or group different sizes together for a more noticeably unique look. The best way to keep your baskets flowing throughout your home is to pick a weave and color in your baskets.  For the baskets in my home, I have chosen a seagrass weave in a natural color.


I really enjoy looking through different magazines and catalogues, but they seem to pile up really quickly.  So, to keep them readily available but tucked away I stack them up in this basket next to my chair. 


One thing that I like to keep out in my office are cheap pads of paper.  To keep them looking nice, I stack them upright in a basket.  This way I can keep my office looking great but still have it functional at all times.


I don't know what my husband would do without this basket!  I have never seen anyone lose keys like him.  So, to keep our mornings somewhat organized I have put this basket by our front entrance to hold keys and any little odds and ends that need to be by the front door.


I like to keep a few spare pillows available in my guest room for my guests.  To do this, I stacked two pillows in a basket underneath my bookshelf.


If it wasn't for this basket, I don't think I would ever be able to watch television.  This basket is what keeps all of our remotes in one place.  Because they have a place to go, everything stays more organized.


There is a gap between our cabinets and our fridge.  To fill this, I used three baskets side by side.  These baskets really warmed up a cold place. (no pun intended)  They added a very natural look to the stainless fridge and you can always use extra storage in a kitchen.

I know not everyone loves to organize as much as I do, but I promise it helps.  It's also a great project to tackle in these winter months.  Try to make this a resolution for yourself.

Inexpensive Bathroom Remodel

I am really excited to share my ideas on how to update your bathroom with little cost.  Unfortunately, I don't have any before pictures, because I was too excited to get to the demo part that I forgot to take my before shots.


The first thing we changed in the bathroom was the mirror.  The previous owners of the house had a huge all in one cabinet over the sink.  By all in one I mean a double medicine cabinet, light, and three mirrors all in one piece of furniture.  So, you can imagine how much space that took up in the room.  With the mirror being right when you walk in, I did not want it to take up any space visually.  So, I decided to go with a simple framed mirror from Lowes instead of a cabinet. 


 I originally bought a bathroom cabinet to go over the toilet.  I had that up for awhile, but it never seemed to fit the space.  With all of the furniture and really no decorations, the bathroom felt heavy.  I wanted to add some bathroom related decorations, but I didn't want to overwhelm the space.  In order to do this, I decided to remove the cabinet and add open shelving.  I went to Lowes to see what they offered for shelving and found a lot of different mix and match options which is great for every style.  I chose less expensive brown shelves, so I could go with a little more detailed hardware.  I couldn't believe how much this opened up the space.  Being able to see the wall behind the shelving made such a difference. 

When it came to decorating the shelving, I wanted to use things that would be relevant to a bathroom.  By doing this, the room feels lived in and user friendly to a guest.  I have seen the apothecary jar look at Pottery Barn and I wanted to recreate this on a more realistic budget.  I bought my jars at HomeGoods and all of my bathroom products at Target.  HomeGoods is a great source for inexpensive apothecary jars in any size.


With all of the renovation products out there, I knew they had to sell toilet handles and...they do!  There was absolutely nothing wrong with our toilet, so I didn't want to waste any money or time trying to replace it.  Instead, I found an oil-rubbed bronze handle at HomeDepot and it gave the toilet a whole new look for under $10.00.


With the bathroom being on the smaller side, I really wanted to keep it simple.  Rather than a print, I chose a brown waffle shower curtain from Bed Bath and Beyond. (Don't forget to use coupons!)


Before, the sink was a pedestal sink.  These can be very nice, but ours was old and really needed replacing.  My options were slim due to the size I needed, but I found this piece at Home Depot for under a $100.00.  The faucet was not included.  Some people think that is a bad thing, but I would rather it that way so that I can pick out the finishing that I like.


The last item on our bathroom remodel list was the floor.  This project was something that we really wanted to cut costs on because we knew it was only temporary.  A year later, it's still there.  We used peal and stick tile from Lowes and it turned out looking great.  This was a very easy project.  All you need is a tape measurer and an exacto knife.  From start to finish, it only took about an hour.


These are all changes that anyone can make and they made such a difference in our bathroom.
Related Posts Plugin for WordPress, Blogger...