High/Low Recreations - Ledge

You may have picked up on this already, but I really love PotteryBarn.  However, most things there are a little pricey for me so I like to use there ideas for my inspiration and try to find a more inexpensive way to create their look.

One thing that I have been eyeing in their catalog was a broken ledge.  I always thought it was a very unique piece of artwork and the look of it really flows with the decorations in my home.  The only problem was the ledge was $300.00.

I was out shopping one day at HomeGoods, which I frequent often, and saw a perfect replica of that same broken ledge.  I was so excited that I had finally found something similar.  Even better, the piece from HomeGoods was only $40.00 so you can imagine my excitement.

PotteryBarn inspiration...


HomeGoods purchase...


In my guest room...


If you are interested, this was a recent find so you may also get as lucky as I did.  Good Luck!

Guest Room Updates

It was time for a little tweaking and updating in my guest room, so I have made some changes that I will be sharing with you today.

One of the things I had been wanting to update were the rugs I had in my guest room.  The rugs that I had were really just place holders until I found one that I wanted.  I chose a similar rug to the one in my living room to keep some continuity between the two spaces.  I also chose a much larger rug to make the room seem larger and more open.


I always liked my bookcase, but I wanted to change around some of the decorations that I had so I did a little editing on it.  Hope you like it.

Before...


After...


Another small addition to the room is a laundry basket.  I replaced the laundry baskets in my bedroom, so I decided to put that one in my guest room.  It really makes the room look more lived in.  Plus, it is really helpful to any visitors.


My last but most favorite addition to my guest room is the ledge I hung over the bed.  As soon as I saw this piece in the store I had to buy it.  I love the aged look and the color to it.  It ties in a lot of the different elements that I have going on in the room.


Hope you enjoyed my updates, I know I have!

High/Low Recreations

I am excited to share a new section of my blog with you called High/Low Recreations.  In this section, I will be showing you how to take designer pieces and recreate them for a fraction of the cost.  Doing this is key to any room when you consider your budget.  Everyone wants the high end pieces, but without the cost behind them.

Here is my inspiration for the letter B I created. 


This is a page from the PotteryBarn catalog.  I really loved this vintage "W" in the background leaned on the desk, so I decided to recreate it on my own.

Here is what I came up with.


If you want to see how I created this click here

I am excited to show you how you can get the looks you desire without the high cost.

Living Room Updates

Just when I thought I was finished with my living room, I decided to do some decorating updates.  I guess you are never really finished with any room.

The first thing that I changed was my media stand.  Here is the before...


Here is the after...


I removed the two white baskets and added two large natural sea grass baskets instead.  I really love the two baskets side by side and how large they are.  Both of these baskets are from PotteryBarn.  Usually I like to get my baskets from HomeGoods, but they didn't have two of the same.  This was such a small change, but made a really big impact to my media stand. 
To see how I used baskets in the rest of my home click here

With it getting colder out, I wanted to incorporate a blanket into my living room.  Rather than folding the blanket on the back of the couch, I decided to stuff it into a vase for a different look.  This vase is actually an outdoor pot, but you would never know it.  Always have an open mind when you are shopping.


This next update was a gift from my mom.  She said that every nest needs a bird.  I agree.


My last addition is my new vase.  As soon as I saw this piece, I knew that it would be a great addition to my living room.  I loved the color and rusticity of it.  Pairing the vase with these cream flowers really made it stand out.


 To see the rest of my living room click here

Stay tuned for my guest room updates!

Coming Soon...

Hi Everyone!  
Sorry I have been away, but I have been busy doing some updates around my home.  I have been adding some new decorations to my living room and my guest room that I will be sharing with you this week.  I have also been finishing some work in my office that I am really excited about as well.  All of that exciting news aside, the thing that I am most excited to share with you is the renovation on my family room.  I have decided to completely renovate our family room from the ground up.  I will be sharing this process with you from start to finish (the good and the bad).  I can't wait to share my updates with you in the next couple of days.
See you soon!

Decorating with Baskets

I love organizing myself with baskets.  It's such a great way to free myself of clutter, plus they look great in any room.  The easiest way to ruin a nicely decorated room is to have piles of clutter everywhere.  You can use baskets by themselves or group different sizes together for a more noticeably unique look. The best way to keep your baskets flowing throughout your home is to pick a weave and color in your baskets.  For the baskets in my home, I have chosen a seagrass weave in a natural color.


I really enjoy looking through different magazines and catalogues, but they seem to pile up really quickly.  So, to keep them readily available but tucked away I stack them up in this basket next to my chair. 


One thing that I like to keep out in my office are cheap pads of paper.  To keep them looking nice, I stack them upright in a basket.  This way I can keep my office looking great but still have it functional at all times.


I don't know what my husband would do without this basket!  I have never seen anyone lose keys like him.  So, to keep our mornings somewhat organized I have put this basket by our front entrance to hold keys and any little odds and ends that need to be by the front door.


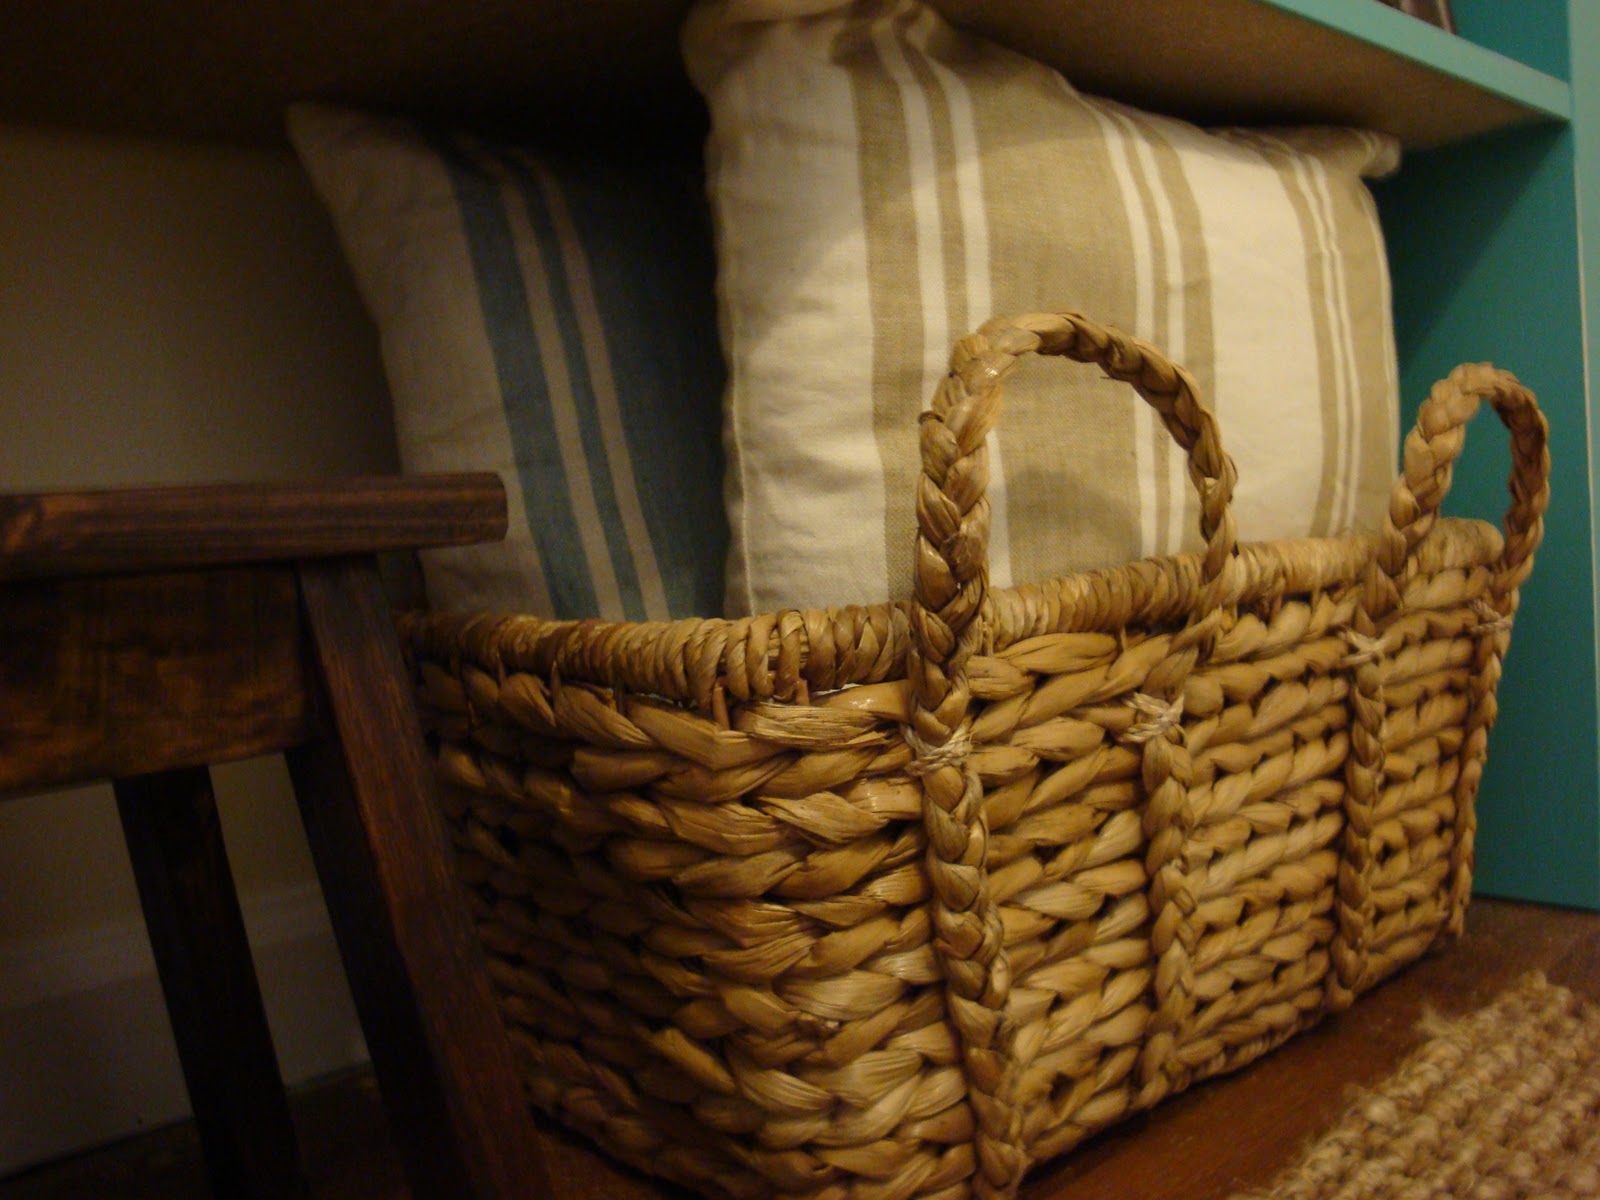
I like to keep a few spare pillows available in my guest room for my guests.  To do this, I stacked two pillows in a basket underneath my bookshelf.


If it wasn't for this basket, I don't think I would ever be able to watch television.  This basket is what keeps all of our remotes in one place.  Because they have a place to go, everything stays more organized.


There is a gap between our cabinets and our fridge.  To fill this, I used three baskets side by side.  These baskets really warmed up a cold place. (no pun intended)  They added a very natural look to the stainless fridge and you can always use extra storage in a kitchen.

I know not everyone loves to organize as much as I do, but I promise it helps.  It's also a great project to tackle in these winter months.  Try to make this a resolution for yourself.

How to Create a Chalkboard

I really wanted to add a chalkboard to my dining room, but I didn't want to spend a lot of money on it.  When shopping at some of my favorite stores, chalkboards ranged from $100-200.00.  I was at the paint department at HomeDepot one day and came across chalkboard paint.  So, instead I decided to save myself money and make my own!  For my actual board, I used mdf.  The surface and edges of mdf are very smooth and there's also no wood grain.  The size of my chalkboard is 2x4 and 3/4 inch deep.  The cost for a board that size was around $10.00.  Before painting my board, I attached my hanging hardware to the back so that I wouldn't scratch the chalkboard finish when it was complete.  Directions on how to paint the chalkboard come with the paint.  I used a paint roller to apply my finish. 


I am still waiting on the right kitchen/food saying to put on my chalkboard, but for now I like "menu".  You can also use this for holidays and seasonal greetings as well as your menu for a dinner party.  It was such an easy project and I really love what it added to my dining room.  I decided to keep my chalkboard simple, but you could always add a frame to yours or cut the board into a shape.

Repurposed Chair

Today I am going to share a quick and inexpensive way to repurpose a chair.  When we moved into our house, the previous owners left us a few items and this chair was one of them.

 Before

It needed some care, but the structure of the chair was still in good condition.  I lightly sanded the chair and then primed the entire chair with spray paint primer.  After a coat of primer, I spray painted two coats of my red.  When doing any kind of spray paint projects, I suggest you use an aerosol spray gun.  You can buy these at Home Depot or Lowes for under $3.00 and they attach to the can of spray paint.  This makes the paint spray more evenly and when doing bigger projects, it's a lifesaver to your hand!

After

I use the chair in my office, but my office is currently under renovation so I brought the chair out to my dining room to show you.  I hope you enjoy.
Related Posts Plugin for WordPress, Blogger...