Twelve Days of Christmas Day 1: Creating a Wreath

Welcome to the Twelve Days of Christmas!  For the next twelve days I will be sharing ideas with you on how to get your house into the Christmas spirit.

The first thing that I like to do is to decide on a theme for my wreath.  This year I wanted to create a "snowed in" greenery outside.  Once I do that, I know what I need to be shopping for.

I wanted to find a plain base for my wreath so that I would have something solid to build on.  I found this wreath at Bordines Nursery for $17.00, which is a pretty good price for what I was looking for.


As you can see, this wreath doesn't really fit the snowed in look that I wanted so I needed to create that look myself.  To do this, I purchased spray adhesive and extra fine artificial snow in a bag.  I found both of these items at Jo-Ann Fabrics. 


To create the look of natural snow, you are going to want to do this in steps.  The first step is to lightly spray the adhesive on the entire wreath.  After spraying, sprinkle the wreath with the snow.  Make sure to sprinkle the snow so that it looks like it naturally fell rather than pressing the snow on the glue.  Let that dry for 30 minutes.  When you come back, lightly shake the excess snow off of the wreath.  Now you can decide where you would like more snow.  Repeat this process until you have the wreath as snowy as you want.

Once the snow is on and the adhesive is dry, it is time to add all of your accents.  I chose to add flowers and a bow.  Before you attach anything, lay everything out to make sure that you are happy with the way it will look.  An easy way to make sure that everything stays secure in the place you want is to attach your accents to the wreath with floral wire.


To hook the wreath to your hanger, weave the floral wire through the back of the wreath and tie that to your door hanger.  This will make it less likely to move with the opening and closing of your door.

You can also use this idea for garland on your mailbox, staircases, and interior doorways.  Have fun being creative!

See you tomorrow for Day 2!

Inexpensive Bathroom Remodel

I am really excited to share my ideas on how to update your bathroom with little cost.  Unfortunately, I don't have any before pictures, because I was too excited to get to the demo part that I forgot to take my before shots.


The first thing we changed in the bathroom was the mirror.  The previous owners of the house had a huge all in one cabinet over the sink.  By all in one I mean a double medicine cabinet, light, and three mirrors all in one piece of furniture.  So, you can imagine how much space that took up in the room.  With the mirror being right when you walk in, I did not want it to take up any space visually.  So, I decided to go with a simple framed mirror from Lowes instead of a cabinet. 


 I originally bought a bathroom cabinet to go over the toilet.  I had that up for awhile, but it never seemed to fit the space.  With all of the furniture and really no decorations, the bathroom felt heavy.  I wanted to add some bathroom related decorations, but I didn't want to overwhelm the space.  In order to do this, I decided to remove the cabinet and add open shelving.  I went to Lowes to see what they offered for shelving and found a lot of different mix and match options which is great for every style.  I chose less expensive brown shelves, so I could go with a little more detailed hardware.  I couldn't believe how much this opened up the space.  Being able to see the wall behind the shelving made such a difference. 

When it came to decorating the shelving, I wanted to use things that would be relevant to a bathroom.  By doing this, the room feels lived in and user friendly to a guest.  I have seen the apothecary jar look at Pottery Barn and I wanted to recreate this on a more realistic budget.  I bought my jars at HomeGoods and all of my bathroom products at Target.  HomeGoods is a great source for inexpensive apothecary jars in any size.


With all of the renovation products out there, I knew they had to sell toilet handles and...they do!  There was absolutely nothing wrong with our toilet, so I didn't want to waste any money or time trying to replace it.  Instead, I found an oil-rubbed bronze handle at HomeDepot and it gave the toilet a whole new look for under $10.00.


With the bathroom being on the smaller side, I really wanted to keep it simple.  Rather than a print, I chose a brown waffle shower curtain from Bed Bath and Beyond. (Don't forget to use coupons!)


Before, the sink was a pedestal sink.  These can be very nice, but ours was old and really needed replacing.  My options were slim due to the size I needed, but I found this piece at Home Depot for under a $100.00.  The faucet was not included.  Some people think that is a bad thing, but I would rather it that way so that I can pick out the finishing that I like.


The last item on our bathroom remodel list was the floor.  This project was something that we really wanted to cut costs on because we knew it was only temporary.  A year later, it's still there.  We used peal and stick tile from Lowes and it turned out looking great.  This was a very easy project.  All you need is a tape measurer and an exacto knife.  From start to finish, it only took about an hour.


These are all changes that anyone can make and they made such a difference in our bathroom.

Repurposed Dresser

I am really excited to share this DIY project with everyone.  I love this project because it is meaningful to me, plus it's a great thing to know as a fellow diy lover.  

It was important to me to incorporate this dresser into my house because it belonged to my grandpa.  Unfortunately, it did not match anything I owned.  I did some looking around in my house and I decided that the dresser would be a great addition to my office.  The drawers are great for storage, plus I could utilize the top as well.

Once I knew where the piece would live, I had to decide how I was going to repurpose it.  After giving it a lot of thought, I decided to paint it.  Before I show you the final result, here is a before.
(The picture is of the nightstand version, but identical in every other aspect.)


And now the after...


I started by removing all of the knobs.  Then, I primed the entire dresser and drawers with white primer using a wide foam brush.  Using a foam brush took longer, but I did not want any brush marks so it was worth the wait in the end.  Luckily, I only needed one coat of primer.  After that dried completely, I painted two coats of my green with a foam brush as well.  Remember the paint needs to dry fully in between coats for the smoothest finish.  Because I was going to really utilize the dresser, I gave the entire dresser a coat of polyurethane. 

Once the dresser was completed, I had to decide on drawer knobs.  I keep all of the leftovers from my DIY projects.  This is something to keep in mind if you have the storage space.  Because of this, I was able to use knobs from a previous project.  

Here are the knobs before... 


Before painting them, I lined all of the knobs together so I could maximize the spray paint.  It only took me one can of oil-rubbed bronze spray paint to cover all of the knobs for the dresser.


Other than the wait time for the paint to dry, this project didn't take me long and it is now my favorite piece of furniture.  You could complete this whole project in a weekend.  Not everyone has an extra dresser, but this is something that you could do to any piece of furniture.  This is such an important thing to keep in mind when you are wanting to make a few improvements and updates in your own home.


Cottage Chic Guest Room

Welcome to my guest room.  I am really happy with the way it has turned out and I hope my guests will be too.  It was very important to me to create a space for my guests that felt cozy and welcoming. 


When I was deciding how to decorate the bed, I wanted to add a lot of pilows and the look of layers for less.  The back row of pillows contains two white euro pillows from Ikea.  The next layer is the sham that came with the duvet cover.  This pulls the print from the bedding up to the pillows.  I then wanted to add a couple of toss pillows for look.  For a little continuity, I have the same white toss pillow on my living room chair as well.  I really liked the teal color of the next pillow and the cylinder shape so I added that for an extra touch.  To create the layer look for less, fold the duvet back to reveal the sheet.  Plus, the back side of the duvet is a different print so it creates the look of another layer.


To add one more layer, drape a throw blanket loosely at the foot of the bed. 


Through out my living room, dining room, and guest room I have white drapery.  I really love the clean and airy look it gives to a room.  Considering it is a guest room, I added the brown blinds to give privacy.


I wanted to add a pop of color to the room so I decided to create this table in a teal to coordinate with the bedding.  To see how I painted this table click here


I found this mirror at HomeGoods and the frame was exactly what I wanted to add into the room.  However, when I bought the mirror it was black.  To recreate this, place cardboard on the mirror and tape the edges with painters tape.  Before you paint, always remember to use primer first.  This will help the paint stick and last longer.
As you can see from my Halloween post, I really like to use apothecary jars.  They are a nice way to get creative.  Currently, I have sea shells in mine from the summer.  Stay posted to see how I use my apothecary jars for Christmas.

It's not a room that gets used all the time, but the great thing is if I have guests over there is no pulling out an air mattress and bedding.  Guests will now have a place that feels like their own and for me it's a finished room that I am proud to walk by.

Letter B

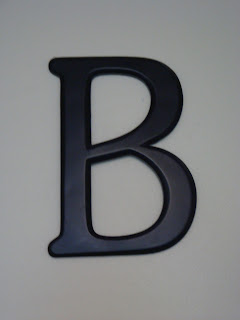
I really like how people incorporate their initials into their home.  It gives a subtle personal touch to any space.  I incorporated the letter B into my office for my last name.  When I bought the letter, it came in a black finish.  I wanted to create an aged gold look so it would compliment all of my oil-rubbed bronze pieces.

Before


After


To create this aged look, I took a small dab of vaseline and rubbed it lightly on the parts of the B that would naturally age.  Such as the corners and raised areas.  After applying the vaseline, I spray painted the entire B with two coats of gold.  Once it was completely dried, I took a paper towel and wiped the parts of the B where I applied the vaseline.  When doing this, do little bits at a time so you only wipe away portions.  This was a very fun and simple project, good luck!

HGTV Top Viewed

I am so excited.  Today I was the top viewed on HGTV for my living room.  Thank you everyone for checking out my space!  If you missed it, check out the link below.  Thanks again everyone.


Related Posts Plugin for WordPress, Blogger...