I was shopping around at PotteryBarn one day (I know...what's new) and I saw this clock wall that they had arranged above their counter. I instantly fell in love with it. After making sure nobody was around, I took a picture of it with my phone. I'm sure no one would have cared if I took a picture, but what can I say I was a bit of a chicken about it.
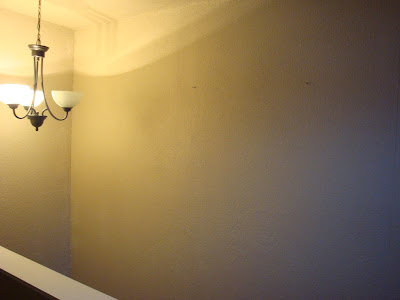
As soon as I got home, I started planning out where I could recreate something like this. I decided to create my clock wall on my upstairs landing. It's such a big empty wall that always bothered me, but I could never find the right size artwork.
Here is the wall before...
At the top of the landing, I have this window that I was looking to give a refresher to as well.
Here is the window before...
After deciding on a place in my house to create this clock wall, I had to start finding materials. I already had a round clock that I would use as my starter. One thing that I found so unique about my inspiration was the over-sized pocket watch. I knew that without that, I wouldn't be as happy with the final outcome. I knew that PotteryBarn sold that pocket watch so I could always use that as a back up, but I really wasn't looking to spend that much on this project. While at one of my usual HomeGoods trips, I found this red pocket watch clock. I wanted all of my clocks to be black, so I decided I would just paint this one and not push my luck.
Here is the clock before...
I used Rustoleum paint and primer in one semi-gloss black paint to paint this clock. I covered the glass with paper and began to spray paint it. I chose to do three coats of spray paint because it was such an easy painting project, but two would have been fine.
Here is the clock after...
Once I had all of my materials I could begin my layout. I bought all of my picture frames at Ikea. I could choose from a variety of sizes and they were all very inexpensive, which I like. While I was there, I also picked up another small clock. Now that I had all of my materials, I could begin my layout. The first thing I did was to measure out how large I wanted the artwork to be and recreate that measurement on the floor. Then I could begin placing the clocks and frames where I wanted them. Once I decided on a layout, I could see how I needed to print my pictures.
Instead of buying clock prints, I took my own pictures. I had a few clock pictures from an old decoration that I used before, so I decided to take pictures of the actual artwork. I took the pictures from all different angles and closeness to create different looks. After I had my pictures printed and placed in the frames I began to hang them. While I was doing this project, I decided to change out my light fixture that I have been wanting to update as well.
Here is my wall after...
I wanted to have more unique window curtains because the space was lacking color. I really liked the pattern and color of these mixed with the dark blinds.
Windows after...
Thanks for visiting!


that looks amazing! very inspiring
ReplyDeleteThank you so much! Now I love to walk by that wall that was always on my mind before.
ReplyDeleteWow! You literally created art on a blank wall - very artistic!
ReplyDelete